
Most organisations know they should test their defences. Far fewer know where to start. Understanding how to do penetration testing properly, from scoping through to reporting, is the difference between a genuine security assessment and a box-ticking exercise that leaves critical vulnerabilities undiscovered.
Penetration testing simulates real-world attacks against your systems, networks, and applications to find weaknesses before an actual threat actor does. But it’s not a single action; it’s a structured, multi-stage process that demands planning, the right methodology, and skilled execution. Whether you’re an IT manager exploring testing for the first time, a business owner preparing for ISO 27001 certification, or someone considering a career in offensive security, knowing what each phase involves gives you a clearer picture of what good looks like.
At TrustedIA, we’ve delivered penetration tests across a wide range of environments as part of our managed security services, backed by over 30 years of hands-on IT and cybersecurity experience. This guide walks you through the complete process, stage by stage, so you can approach your next engagement with confidence, ask the right questions, and understand exactly what your testers should be doing and why.
What penetration testing is and when to use it
A penetration test is a controlled, authorised simulation of a cyberattack, carried out by a skilled tester or team against your systems, applications, or network infrastructure. The goal is straightforward: find and demonstrate exploitable weaknesses before a real threat actor does. Unlike a theoretical risk assessment, a well-executed pen test gives you concrete evidence of what an attacker could actually achieve, not just a list of potential concerns flagged by a scanner.
The difference between a vulnerability scan and a pen test
Many organisations confuse these two activities, but they serve fundamentally different purposes. A vulnerability scan uses automated tools to detect known weaknesses across your environment; it runs quickly and can be scheduled to repeat regularly, but it never attempts to exploit anything it discovers. A penetration test goes significantly further: a skilled tester actively chains vulnerabilities together, attempts to escalate privileges, pivots across your network, and demonstrates precisely what an attacker could do with the access they gain.
Treating a vulnerability scan as a substitute for a pen test leaves you with an incomplete picture of your real-world exposure.
The experience of the tester makes a considerable difference at this stage. Automated tools miss logic flaws, broken authentication flows, and business-layer weaknesses that only surface when someone probes how your application behaves under realistic conditions. That’s why understanding how to do penetration testing properly means combining the right tooling with human judgement throughout every phase, not just at the point of discovery.
When you should commission a penetration test
Knowing when to test is as important as knowing what to test. The most common trigger points that organisations face include:
- Before a major product or system launch, when fixing vulnerabilities is still relatively low cost and low disruption.
- As part of ISO 27001 certification or annual review, to support your risk treatment plan and Statement of Applicability with technical evidence.
- After a significant infrastructure change, such as a cloud migration, new network segment, or major application deployment.
- Following a security incident, to confirm the attack vector is fully closed and no residual attacker access remains.
- In response to a client or contractual requirement, particularly common in financial services, healthcare, and public sector supply chains.
Running tests on a regular annual cadence (or more frequently for high-risk systems) also helps you measure whether your security posture is genuinely improving over time. Your senior leadership or board may also need evidence of ongoing testing to satisfy cyber insurance underwriters, or to meet due diligence requirements ahead of a commercial transaction or acquisition.
Before you start: rules, scope and safety
Before a single scan runs or a single packet gets sent, you need a clear, documented agreement in place. Skipping this step doesn’t just create legal risk; it fundamentally undermines the value of the test. Without defined boundaries, testers can drift into out-of-scope systems, cause unintended outages, or create liability for both sides. Getting this groundwork right is a core part of understanding how to do penetration testing correctly.
Define your scope in writing
Your scope document sets the boundaries of the engagement and protects both you and your testing team. It should specify exactly which IP ranges, domains, applications, and environments are in scope, and critically, which are not. Shared infrastructure, third-party services, and production databases often need explicit exclusions to prevent disruption to live operations.
A solid scope definition covers:
- Target systems: IP addresses, domain names, application URLs
- Test type: black-box, grey-box, or white-box
- Testing window: agreed hours to minimise operational impact
- Out-of-scope assets: third-party systems, critical production databases
- Permitted techniques: social engineering, physical access, denial-of-service (typically excluded)
Get written authorisation before anything else
Even if you own the systems being tested, you must have written authorisation before your testers begin. Without it, activity that would otherwise be legitimate security testing can fall under the Computer Misuse Act 1990 in the UK. This applies whether you are using an internal security team or an external provider.
A signed rules of engagement document is not a formality; it is a legal and operational necessity for every engagement.
Your authorisation document should also capture emergency contacts and escalation paths, so your testing team can immediately pause activity if they discover a live breach, cause unintended disruption, or encounter systems outside the agreed scope. Establish these procedures before the test begins, not during it.
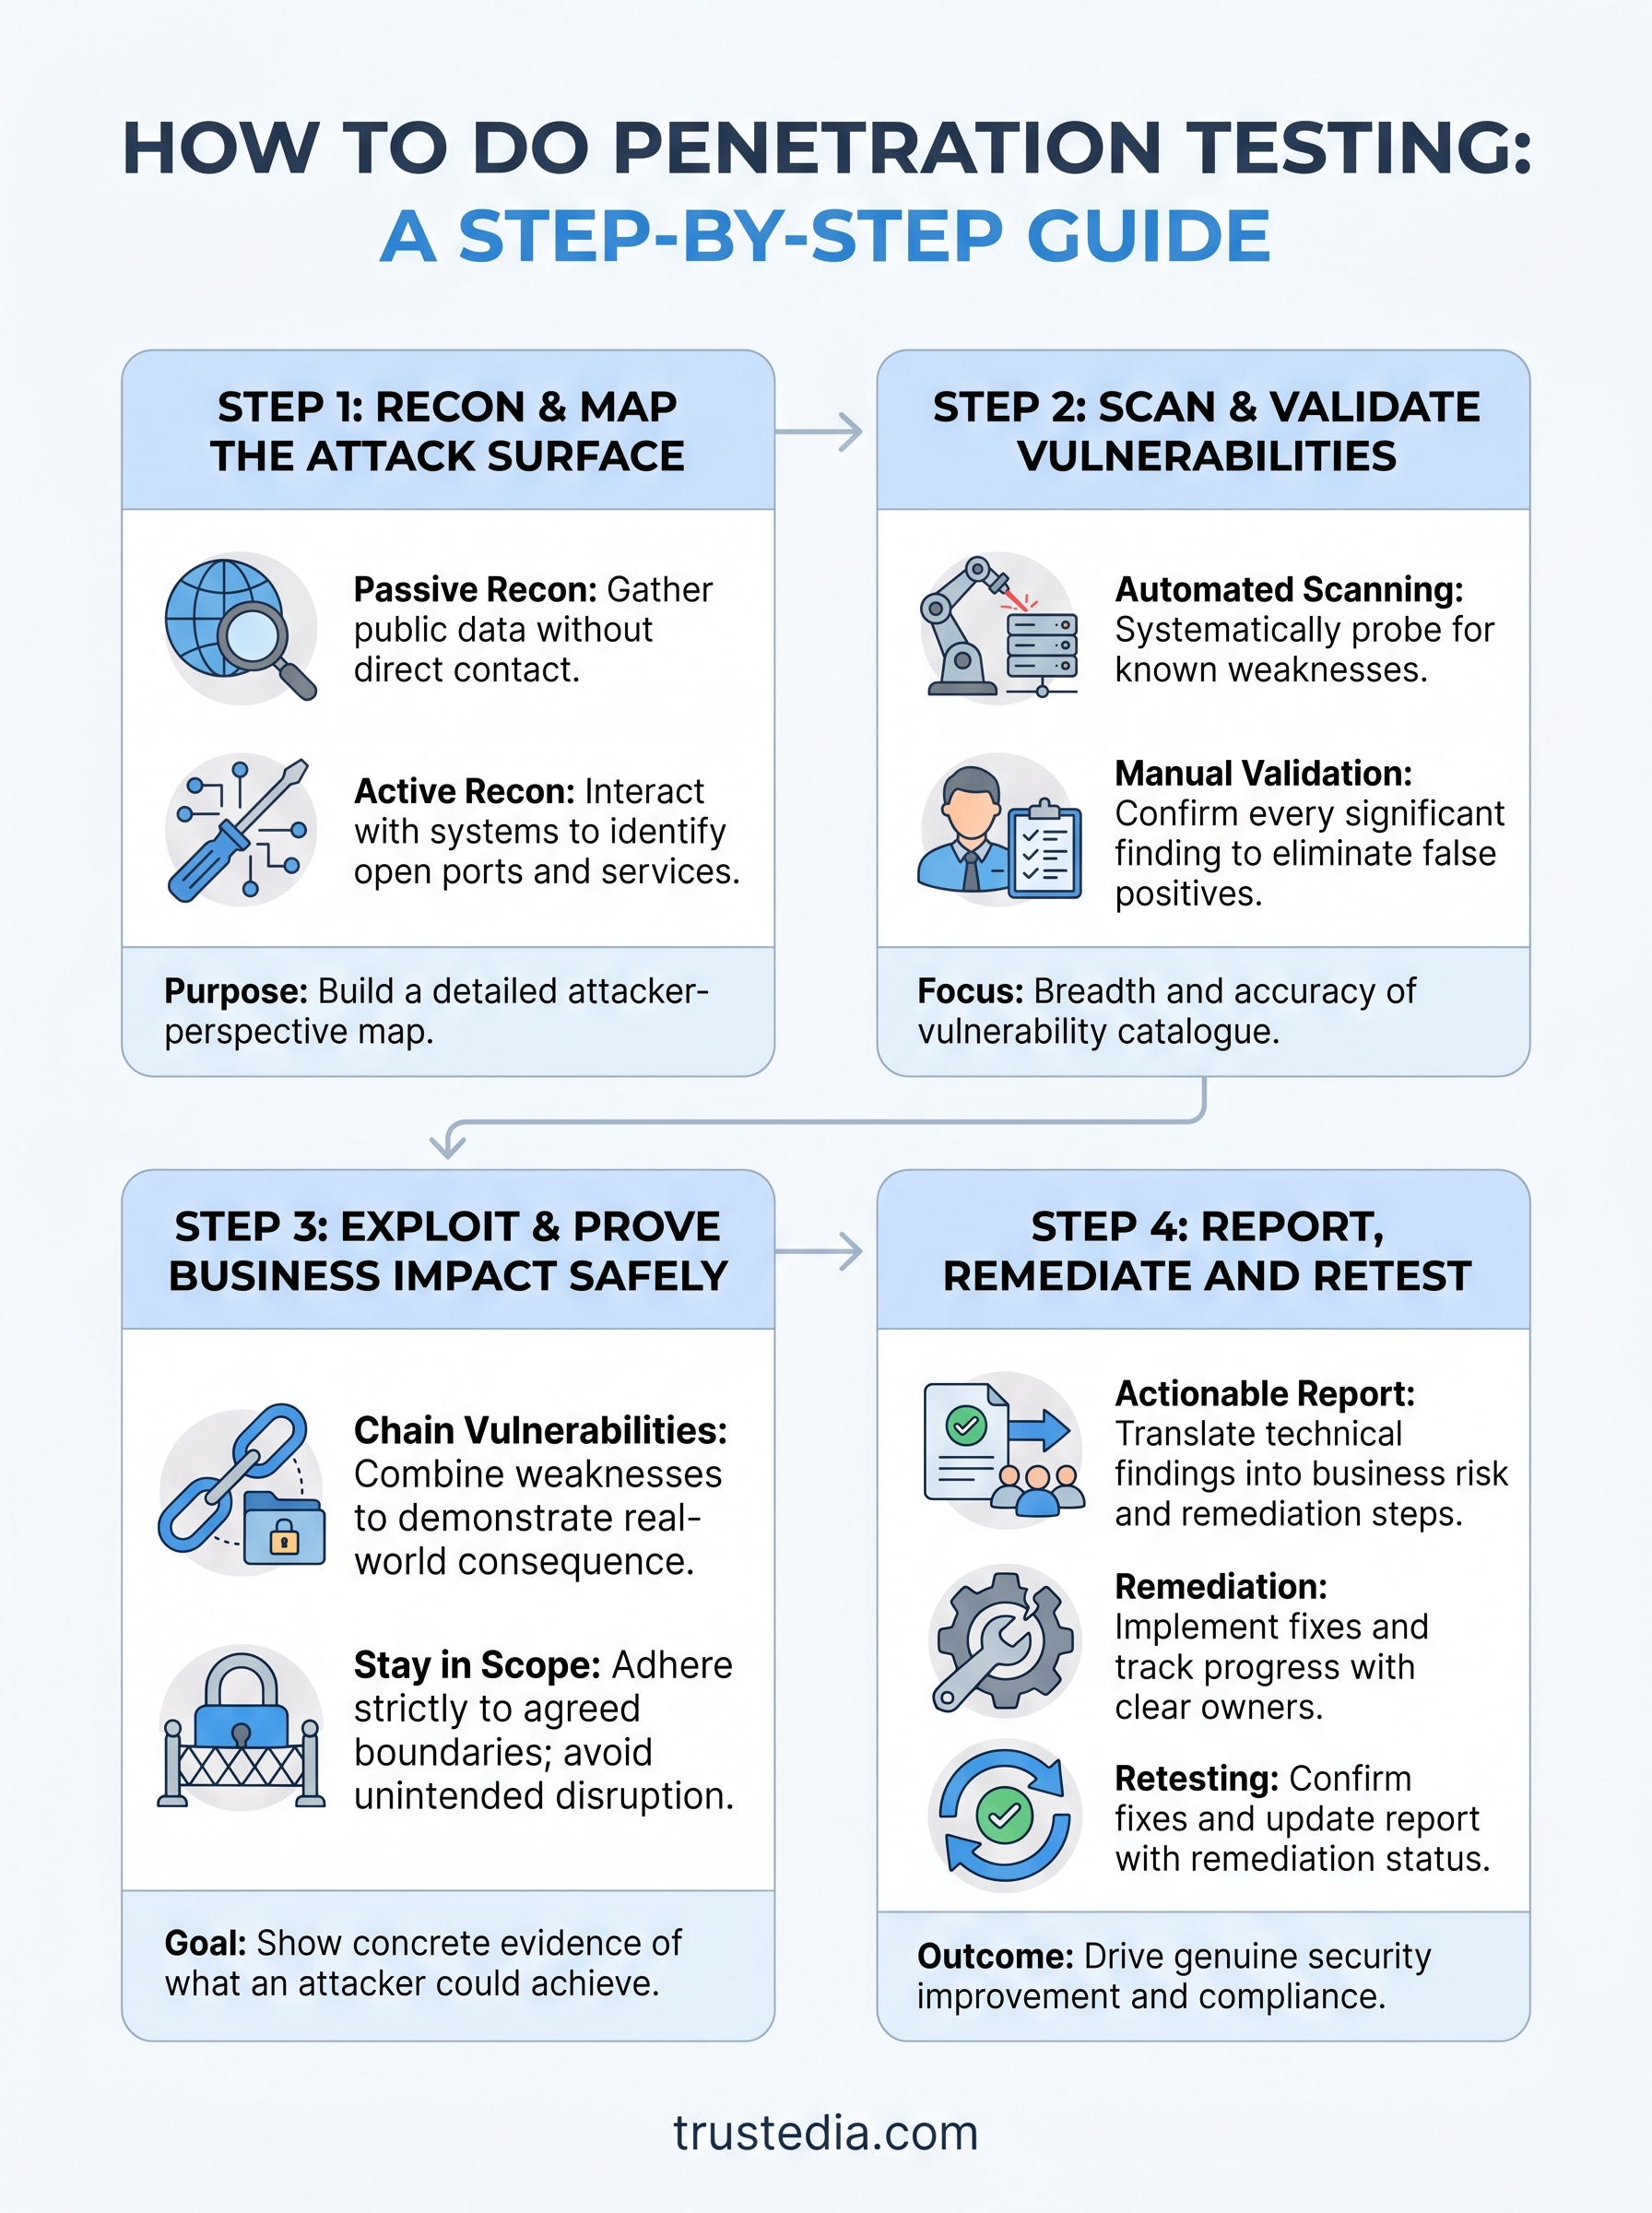
Step 1. Recon and map the attack surface
Reconnaissance is the foundation of every effective penetration test. Before you attempt to exploit anything, you need a detailed picture of what your target environment looks like from an attacker’s perspective. Skilled testers split this phase into two distinct activities: passive recon, where you gather information without touching target systems directly, and active recon, where you interact with the environment to build a more complete map.

Passive reconnaissance
Passive recon involves gathering publicly available information about your target without sending a single packet to their infrastructure. This includes DNS records, WHOIS data, publicly exposed email addresses, subdomains indexed by search engines, job postings that reveal technology stacks, and documents with metadata intact. Tools like theHarvester and Shodan surface a surprising amount of information that organisations have inadvertently made visible. At this stage, your goal is to identify entry points, understand the technology in use, and map the perimeter before any active interaction begins.
The amount of sensitive information that organisations publicly expose without realising it consistently surprises even experienced security teams.
Active reconnaissance
Active recon involves direct interaction with target systems to refine what you discovered passively. This includes DNS zone transfer attempts, port scanning to confirm live hosts and open services, banner grabbing to identify software versions, and subdomain enumeration through controlled queries. At this point, your testing activity becomes detectable to a vigilant defender, which is itself useful information: if your client’s SOC doesn’t flag active recon, that tells you something meaningful about their detection capabilities.
A practical active recon checklist for this phase includes:
- Open ports and services: TCP and UDP across the agreed IP ranges
- Software versions: web servers, mail servers, VPN endpoints
- Subdomains and hostnames: beyond what passive recon surfaced
- Authentication endpoints: login pages, admin panels, API gateways
- Cloud assets: S3 buckets, Azure blobs, publicly accessible storage
Completing this phase properly sets the quality of everything that follows in how to do penetration testing effectively.
Step 2. Scan and validate vulnerabilities
With your attack surface mapped, you move into active vulnerability scanning, where automated tools systematically probe your in-scope systems for known weaknesses. This phase is about breadth first: you want a comprehensive catalogue of potential vulnerabilities across every live host before you decide which ones are worth pursuing. The key discipline here is validation; raw scanner output is always noisy, and acting on unverified findings wastes time and risks false escalations.
Run your scanner against in-scope targets
Point your scanner at the confirmed live hosts and services you identified during recon. Configure it to match your agreed testing window and avoid hammering production systems with traffic volumes that could cause disruption. A well-configured scan covers open ports, service versions, missing patches, weak cryptographic configurations, and default credentials. Your output at this stage is a raw findings list, typically ordered by severity (critical, high, medium, low, informational).
Never feed unvalidated scanner output directly into a report; every significant finding needs a human to confirm it is real before it carries weight with your client.
Validate every significant finding manually
Automated scanners produce false positives at a predictable rate, and treating each flagged item as confirmed without checking will damage your credibility fast. For each critical or high-severity finding, you need to manually reproduce the condition to confirm the vulnerability exists in your specific environment. A flagged missing patch, for example, might already be mitigated by a compensating control that the scanner cannot see.
Work through your findings with a triage table like this:
| Finding | Severity | Scanner Confirmed | Manually Validated | Notes |
|---|---|---|---|---|
| OpenSSL version outdated | High | Yes | Yes | Exploitable on port 443 |
| Default admin credentials | Critical | Yes | Pending | Requires manual login check |
| Self-signed certificate | Low | Yes | Yes | No direct exploit path |
This validation step is what separates a professional approach to how to do penetration testing from simply running a tool and forwarding its output.
Step 3. Exploit and prove business impact safely
Exploitation is where a penetration test moves from theory to demonstrated evidence. Your objective at this stage is not to cause damage or maximise access for its own sake; it is to prove the real-world consequence of each confirmed vulnerability to the people who need to act on it. This distinction matters: safe, controlled exploitation within your agreed scope is what separates professional testing from reckless activity.

Chain vulnerabilities to reach meaningful access
A single low-severity finding rarely justifies remediation effort on its own. Where exploitation becomes genuinely valuable in understanding how to do penetration testing is when you chain multiple weaknesses together to reach sensitive data, privileged accounts, or critical infrastructure. For example, an exposed subdomain running an outdated web framework might give you an initial foothold; misconfigured internal permissions could then let you escalate to domain admin from there.
The business impact of a vulnerability chain is almost always more severe than the sum of its individual findings, and your report needs to reflect that clearly.
A structured approach to this stage looks like this:
- Start with highest-confidence findings: exploit validated critical and high-severity issues first
- Document every action as you go: screenshots, command outputs, and timestamps
- Stop at the agreed boundary: once you have demonstrated the impact, do not go further
- Record what data you accessed: file names and system names, but avoid extracting real personal data
Stay within safe boundaries during active exploitation
Your rules of engagement define exactly how far you can go, and you must treat those boundaries as fixed throughout this phase. If you unexpectedly reach a system outside scope or encounter live personal data, pause immediately and notify your client contact before continuing. Active exploitation can cause unintended service disruption, so keeping your client’s emergency contact reachable throughout this step is not optional.
Step 4. Report, remediate and retest
The final phase of how to do penetration testing turns your findings into something your organisation can actually act on. A test that ends with a raw findings dump handed over without context delivers minimal value. Your report needs to communicate what was found, what it means in business terms, and what to do about it, in language that both technical teams and senior decision-makers can understand.
Write a report that drives action
Your report should open with an executive summary that captures the overall risk picture without technical jargon. Below that, each finding needs its own entry covering the vulnerability description, how you reproduced it, the business impact if exploited, and a clear, actionable remediation recommendation with enough detail for a developer or sysadmin to act on immediately.
A finding entry template looks like this:
| Field | Content |
|---|---|
| Finding ID | VULN-001 |
| Title | Unauthenticated admin panel exposed |
| Severity | Critical |
| Evidence | Screenshot and HTTP response |
| Business Impact | Full application compromise |
| Recommendation | Restrict access by IP, enforce MFA |
| Retest Status | Pending |
A report that cannot be understood by the person responsible for fixing the issue will sit unread in a shared drive.
Track remediation and close the loop
Once your team works through the findings, retesting is not optional. Retesting confirms that each fix actually resolves the vulnerability rather than masking it at the surface level. Assign a clear owner and deadline to every finding before the report leaves your desk, so accountability is built in from the start.
Schedule retest activity within a defined window, typically 30 to 60 days after the initial report, depending on severity. Critical issues warrant faster turnaround. Completed retests should update your original report with a confirmed remediation status, giving you a clean audit trail for compliance, insurance, or client due diligence purposes.
Wrap-up and next steps
Following the process above gives you a complete picture of how to do penetration testing from the first scoping conversation through to a verified remediation. Each phase builds on the last: recon informs your scanning, scanning validates your exploitation targets, and your report turns every finding into actionable work your team can close out and retest against a clear deadline.
Doing this well takes time, skill, and access to tooling that most in-house teams don’t maintain day-to-day. If you’re preparing for ISO 27001 certification, responding to a client requirement, or simply want confidence that your defences hold up under realistic pressure, working with an experienced provider removes the guesswork. Every engagement we run at TrustedIA follows exactly this methodology, backed by over 30 years of hands-on security experience.
Get in touch with the team at TrustedIA to discuss the right scope and approach for your environment.