You’ve just discovered something is wrong. Maybe it’s an unusual login alert, a ransom note on a server, or a phishing report from an employee. Whatever triggered it, you now need to know how to investigate a data breach properly, and you need to move fast without making costly mistakes that damage evidence or breach your reporting deadlines under UK GDPR.
This guide gives you the exact sequence experienced incident responders follow: containing the threat, preserving evidence, scoping what data and systems were affected, and working out whether you’re legally required to notify the ICO or affected individuals within 72 hours. We won’t just tell you what to do, we’ll explain why each step matters and where most businesses go wrong.
We’ve built this from years of running CyberSOS incident response engagements for organisations that had no idea where to start once an attack hit. You’ll get a practical, step-by-step framework covering detection, evidence gathering, risk assessment, containment, and regulatory notification, so you can act decisively rather than freeze while the clock is running.
On session {
Step 1. Contain the breach and secure your systems
Once you suspect a breach, your first job is to stop the bleeding without destroying the evidence you’ll need later. Panic leads teams to unplug servers, wipe infected machines, or reset every password in sight before anyone has worked out what actually happened. That instinct is understandable, but it can wipe out the very logs and artefacts your investigators need to establish how attackers got in and what they touched. Containment and evidence preservation have to happen together, not one after the other.

Isolate without destroying
Segregate affected systems from the network rather than shutting them down outright. Disconnecting a network cable or disabling a switch port keeps a compromised machine’s memory and disk state intact for forensic imaging, while powering it off can erase volatile data forever. Work through this checklist as soon as you spot suspicious activity:
- Disconnect affected devices from the network, but leave them powered on where possible
- Suspend or reset credentials for any accounts showing unusual activity
- Block malicious IP addresses or domains at the firewall
- Revoke active sessions and API tokens tied to compromised accounts
- Take a snapshot or forensic image of affected systems before any remediation
Contain the threat first, but never at the cost of the evidence that explains how it got in.
Bring in the right people early
Loop in your incident response team, whether that’s an internal function or an external partner like a CyberSOS engagement, before you start making changes to production systems. A structured response, aligned with guidance such as the NCSC’s incident management principles, avoids the common trap of well-meaning IT staff accidentally destroying logs while trying to fix things quickly. Assign one person to own communications and decisions during containment, because conflicting instructions from multiple stakeholders is how mistakes happen under pressure.
Keep the business running where you can
Parallel to containment, check whether unaffected systems can keep operating so the business doesn’t grind to a halt unnecessarily. Segmenting the network properly beforehand makes this far easier, since you can isolate a compromised segment without taking down everything else. If you don’t have that segmentation in place already, this is the moment you’ll wish you did, and it’s worth revisiting once the immediate crisis has passed.
Step 2. Investigate and gather the evidence
With the immediate threat contained, your focus shifts to reconstructing what happened. This is where you establish the who, what, when and how of the breach, and it’s the foundation everything else rests on, including your risk assessment and any regulatory notification. Rushing this stage or skipping it entirely is the single biggest reason businesses under-report breaches or miss attackers still lurking in their network.
Build a timeline from your logs
Start by pulling logs from every system that might hold a trace of the attacker’s movements: firewalls, VPN gateways, endpoint detection tools, email servers, and authentication systems like Active Directory or your identity provider. Cross-reference timestamps across sources to build a clear sequence of events, from initial access through to whatever triggered your discovery. Common sources worth checking include:
- Firewall and VPN connection logs
- Endpoint detection and antivirus alerts
- Email gateway and phishing report logs
- Authentication and privileged account activity
- Database and file access logs for sensitive records
A breach investigation without a timeline is just guesswork with extra steps.
Preserve evidence with a proper chain of custody
Every piece of evidence you collect needs to hold up to scrutiny later, whether that’s an insurer, a regulator, or law enforcement asking questions. Document who accessed what, when, and why, and keep forensic images and log exports in a secure, access-controlled location separate from your production environment. Skipping this step doesn’t just weaken your legal position, it can also mean you overlook the actual entry point because nobody kept a clear record of what was checked and ruled out.
Scope what data and systems were touched
Hunting for the entry point matters, but so does mapping the full blast radius. Identify every system the attacker reached, every account they used, and critically, what categories of personal or sensitive data sat on those systems. This scoping work directly feeds your risk assessment in the next step, so be thorough rather than fast here.
Bring in specialist support if needed
Internal IT teams are often stretched thin, and forensic investigation is a genuinely specialist skill. Engaging an experienced partner, such as a CyberSOS incident response engagement, brings dedicated forensic tooling and the internally developed CRAFT methodology to structure the investigation properly, rather than leaving your team to piece it together under pressure while the business is still disrupted.
Step 3. Assess the risk to those affected
Once you know what happened, you need to work out who’s actually harmed by it. This is the step that determines whether you’re legally required to notify the ICO within 72 hours, whether you need to tell affected individuals directly, and how you prioritise your remediation work. Under UK GDPR, the test isn’t whether a breach occurred, it’s whether that breach is likely to result in a risk to people’s rights and freedoms. Get this assessment wrong and you either under-report, exposing the business to regulatory action, or over-report, causing unnecessary alarm and reputational damage.
Weigh likelihood and severity of harm
Assess two things together: how likely is harm to occur, and how severe would it be if it did. A spreadsheet of email addresses stolen in isolation carries a different risk profile than a database of financial records, health information, or National Insurance numbers exposed alongside login credentials. The ICO’s own guidance sets out this likelihood-and-severity approach as the core test for deciding whether notification is required, and it’s worth reading directly rather than relying on assumptions (https://ico.org.uk/for-organisations/report-a-breach/personal-data-breach/).
If the breach could lead to identity theft, financial loss, or discrimination against someone, treat it as high risk until proven otherwise.
Map the factors that raise or lower risk
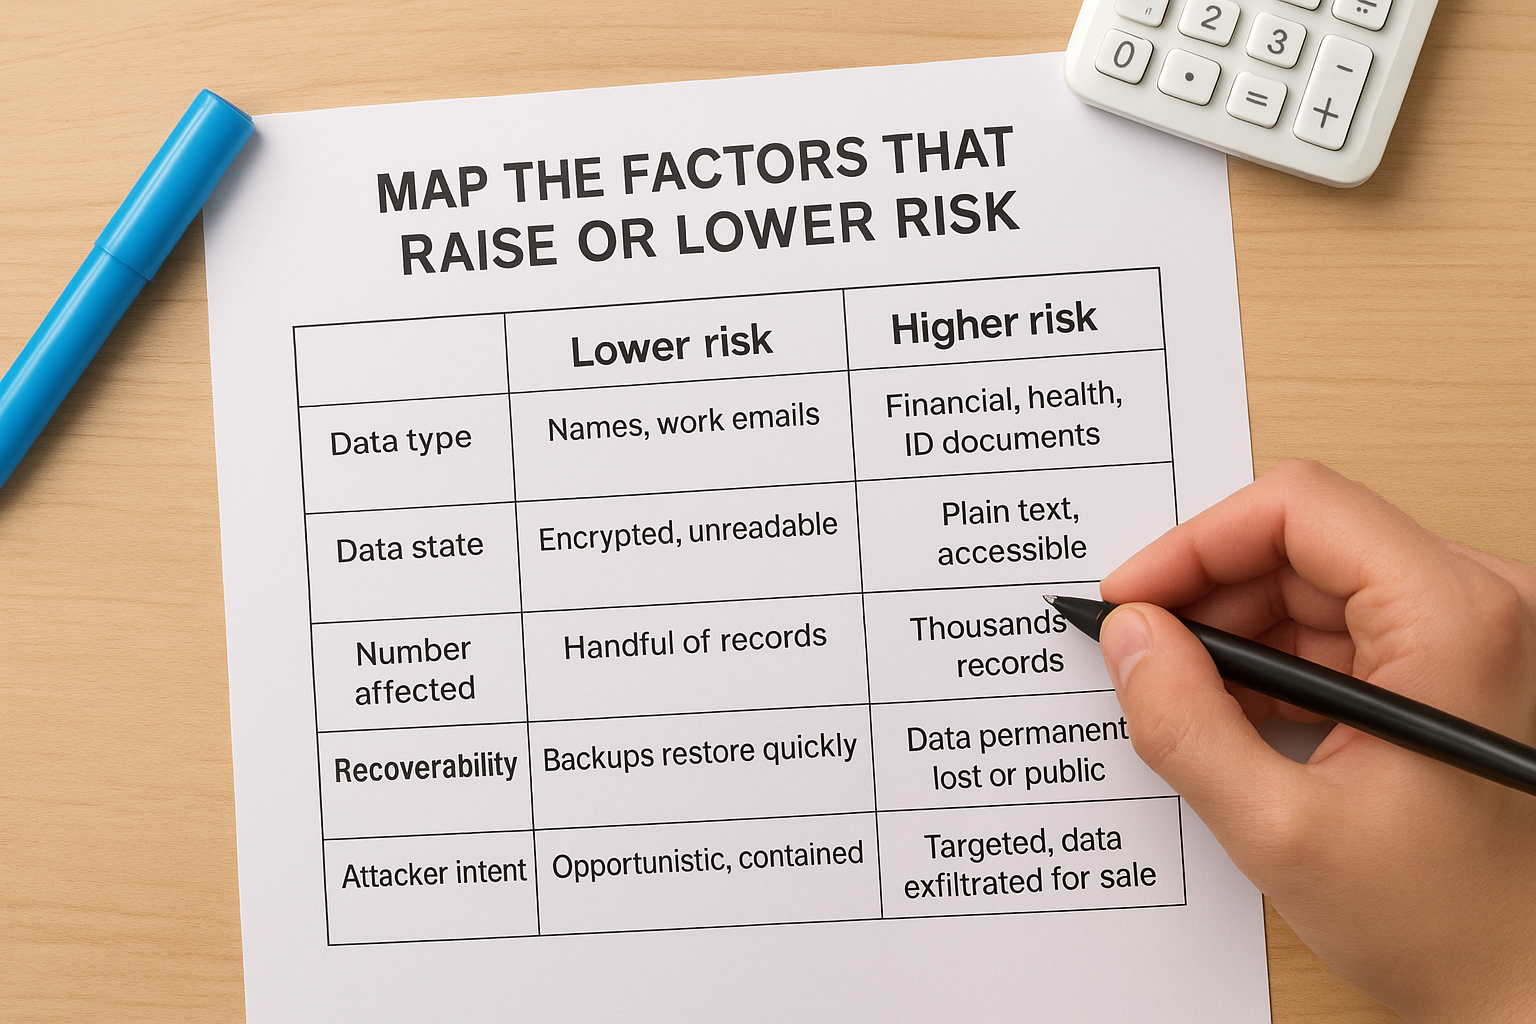
Run through the specific factors that push a breach towards higher or lower risk before you draft any notification:
| Factor | Lower risk | Higher risk |
|---|---|---|
| Data type | Names, work emails | Financial, health, ID documents |
| Data state | Encrypted, unreadable | Plain text, accessible |
| Number affected | Handful of records | Thousands of records |
| Recoverability | Backups restore quickly | Data permanently lost or public |
| Attacker intent | Opportunistic, contained | Targeted, data exfiltrated for sale |
Document your reasoning, not just your conclusion
Writing down how you reached your risk conclusion matters just as much as the conclusion itself. Regulators and insurers will ask why you decided notification was or wasn’t necessary, and "we didn’t think it was serious" won’t hold up without evidence behind it. Record the categories of data involved, the number of individuals affected, whether the data was encrypted, and any mitigating action taken before you finalise your position. Keeping this record alongside your evidence from Step 2 also speeds up the notification process that follows, since you won’t be scrambling to reconstruct your logic under deadline pressure.
Step 4. Notify, report and document the breach
Once your risk assessment points to notification, treat the 72-hour clock as already running, because under UK GDPR it starts the moment you become aware of the breach, not when your investigation finishes. Waiting for a complete picture before you contact the ICO is one of the most common mistakes businesses make, and it’s unnecessary: you can submit an initial report with the facts you have and update it as your investigation progresses.
Report to the ICO within 72 hours
Submitting a report late, or not at all, when the threshold is met can trigger enforcement action on top of the breach itself. Your report to the ICO needs to cover:
- The nature of the breach and approximate number of individuals and records affected
- The name and contact details of your data protection officer or a relevant contact
- The likely consequences of the breach for those affected
- The measures taken or proposed to address the breach and mitigate harm
Use the ICO’s own self-assessment and reporting tool to submit this, since it’s structured around exactly these fields.
Report what you know within 72 hours, then update the ICO as your investigation fills in the gaps.
Notify affected individuals without undue delay
Individuals need direct notification when the breach is likely to result in a high risk to their rights and freedoms, and this communication has to be clear, not buried in legal caveats. Keep it plain and actionable:
Subject: Important security notice regarding your data

We're writing to let you know that on [date], we identified a security
incident affecting [type of data]. We believe [what happened] and have
taken the following steps: [containment/remediation actions].

We recommend you: [specific actions, e.g. reset your password,
monitor your bank statements].

If you have questions, contact [name] at [email/phone].
Keep a breach log for every incident
Recording every incident matters even when notification isn’t required, because the UK GDPR obliges you to maintain internal records regardless of whether the threshold for reporting was met. Log the facts, your risk assessment reasoning, and the actions taken, and retain this alongside the evidence gathered in Step 2. Auditors and the ICO can ask to see this log at any point, and a well-maintained one demonstrates accountability far more convincingly than a verbal explanation after the fact.
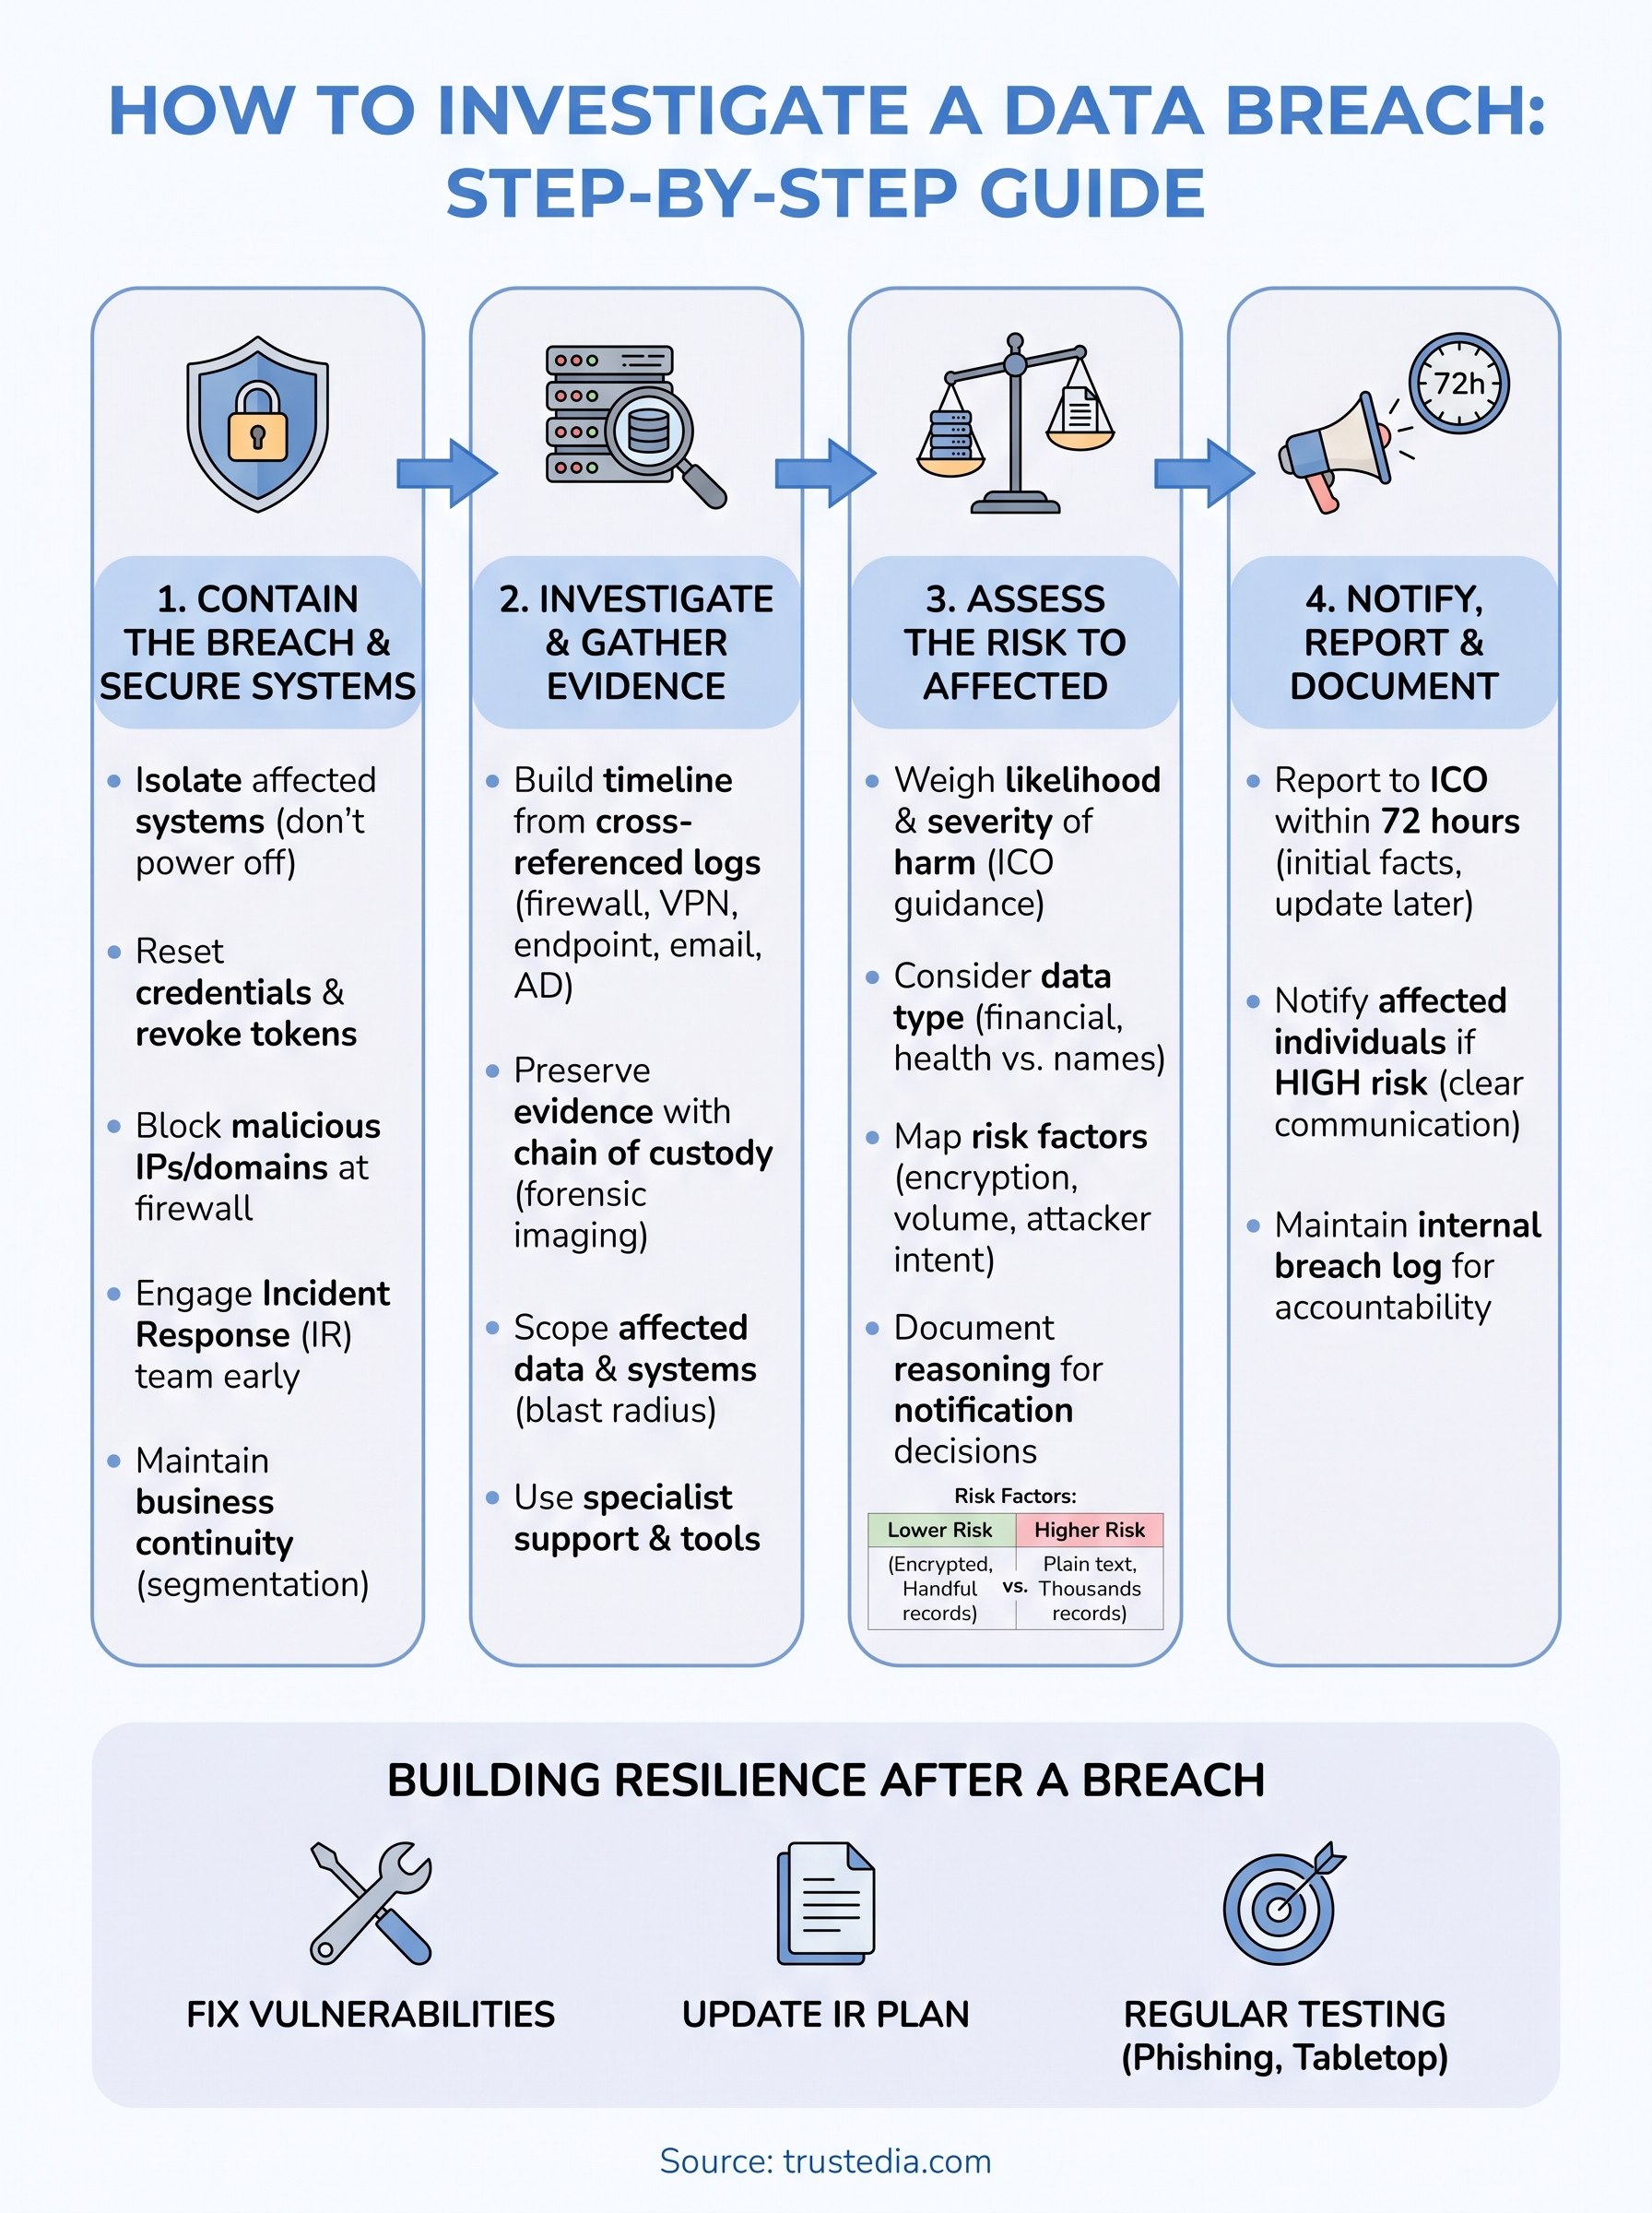
Building resilience after a data breach
Surviving a breach is only half the job. Recovering well means fixing the specific gap the attacker used, whether that’s unpatched software, weak credentials, or a phishing gap in staff awareness, and then testing that the fix actually holds. Skip this step and you’re just waiting for a repeat incident with a different attacker.
Treat the investigation itself as a source of lessons, not just a compliance exercise. Update your incident response plan with what you learned about detection gaps, communication delays, and evidence you wished you’d captured sooner. Regular testing, through simulated phishing campaigns, vulnerability assessments, and tabletop exercises, turns those lessons into muscle memory before the next real incident arrives.
If you don’t have the internal capacity to run this investigation and rebuild properly, that’s exactly the gap a dedicated partner fills. Talk to TrustedIA about a CyberSOS engagement and get a team that’s done this before, on your side from the first alert.