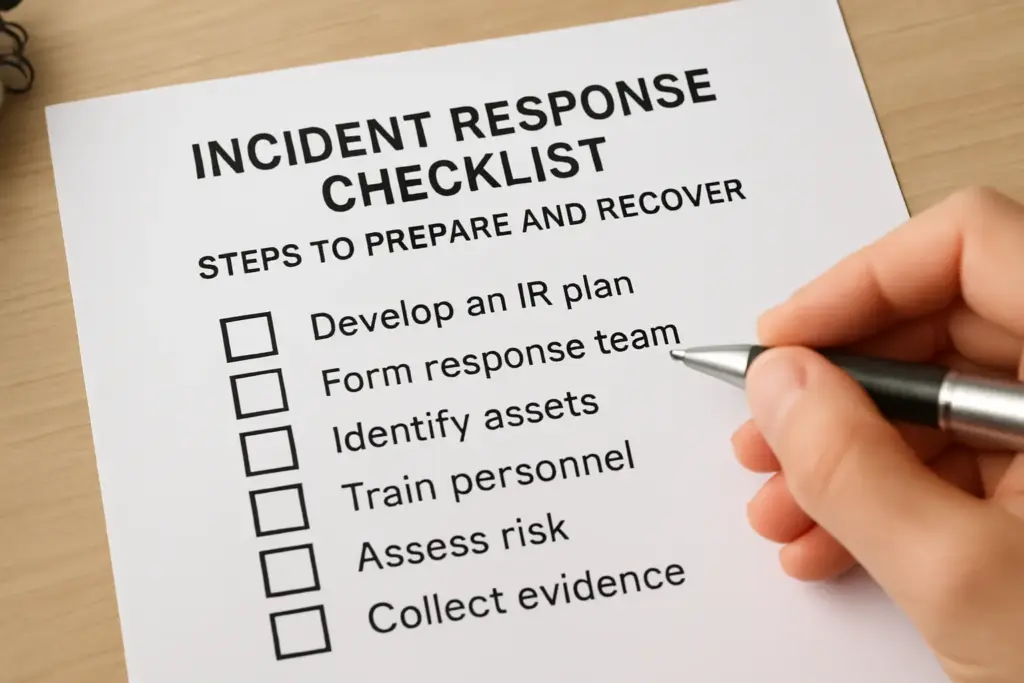
A cyber attack doesn’t announce itself on your schedule. It hits when your team is least prepared, and the difference between a contained incident and a full-blown crisis often comes down to one thing: whether you had a plan ready to execute. An incident response checklist gives your organisation a plan, a clear, repeatable sequence of actions that removes guesswork when every minute counts. Without one, teams scramble, decisions stall, and recovery costs spiral.
At TrustedIA, our CyberSOS Incident Response service has guided businesses through real-world breaches and security events for over 30 years. We’ve seen first-hand what separates organisations that bounce back quickly from those that don’t, and it nearly always starts with preparation done before an incident occurs. That hands-on experience shapes every recommendation in this guide.
Below, you’ll find a practical, step-by-step checklist covering each phase of incident response: from building your response team and defining roles, through detection, containment, eradication, and recovery, all the way to post-incident review. Whether you’re creating your first plan or tightening an existing one, this guide will give you a structured framework you can put to work straight away.
What an incident response checklist should include
A well-built incident response checklist does more than list tasks to tick off. It maps every critical decision point across the full lifecycle of a security incident, from the moment something looks wrong to the post-incident review that stops the same problem from recurring. Without that structure, your team risks missing steps under pressure, destroying forensic evidence unintentionally, or failing to meet regulatory notification deadlines. Under UK GDPR, for example, you have just 72 hours to report a notifiable breach to the ICO.
The most damaging gaps in incident response are rarely technical. They happen because no one agreed in advance who does what, and in what order.
The six core phases every checklist must cover
Most recognised frameworks, including the NIST Computer Security Incident Handling Guide, organise incident response into six repeatable phases. Your checklist should map directly to each of them, giving your team clear checkpoints at every stage and a shared understanding of what comes next. This structure also makes it easier to train staff in advance, so the checklist becomes something people act on instinctively rather than a document they read for the first time under pressure.
| Phase | What it covers |
|---|---|
| Preparation | Team roles, contact lists, tools, access credentials, and communication plans |
| Detection & Analysis | Identifying, confirming, and logging a genuine security incident |
| Triage | Assessing severity, business impact, and response priority |
| Containment | Isolating affected systems and preserving forensic evidence |
| Eradication & Recovery | Removing the threat and restoring normal business operations |
| Post-Incident Review | Lessons learned, documentation, and process improvements |
Roles, responsibilities, and escalation paths
Your checklist also needs to define who owns each action. A task without an assigned role is one that gets assumed and then dropped. Map every checklist item to a specific person or function, whether that’s your IT lead, your CISO, a legal contact, or an external incident response partner. Include direct contact details and named alternates for every key role, so that if your primary contact is unavailable when an incident hits, someone else steps in immediately without confusion.
Set escalation thresholds as part of your checklist structure, too. Specify at what point a suspicious alert becomes a declared incident, who holds the authority to make that call, and when external support or law enforcement becomes necessary. Also, document how your organisation will communicate during an incident, both internally and with customers or regulators. Defining these boundaries before an incident occurs removes the hesitation and internal debate that consistently slow real-world responses down and increase recovery costs.
Step 1. Build readiness before an incident
Preparation is the phase that determines how every other phase runs. Before any incident occurs, your team needs clear roles, documented processes, and the tools to act without delay. This is where your incident response checklist starts, not when an alert fires, but weeks or months beforehand, when you can think clearly and build a solid foundation without pressure distorting your decisions.
Assign roles and document your response team
Every response depends on named individuals knowing their responsibilities before an incident starts. Map out your core team: an Incident Response Lead, a Technical Analyst, a Communications Owner, and a Legal or Compliance Contact. For each role, record direct contact details and a named alternate, so cover is in place if someone is unavailable when it matters most.
Use this template to document your team:
| Role | Primary Contact | Alternate | Contact Number |
|---|---|---|---|
| Incident Response Lead | |||
| Technical Analyst | |||
| Communications Owner | |||
| Legal/Compliance Contact | |||
| External IR Partner |
Store a printed copy of this information somewhere your team can access it even if your primary systems are offline, such as in a locked cabinet on-site.
Confirm your tools and access credentials are ready
Your team needs pre-configured access to detection tools, logging systems, and communication platforms before an incident hits. Verify that credentials for your SIEM, endpoint detection tools, and backup systems are up to date and stored securely in a password manager or a sealed physical document. Also, confirm that forensic investigation tools are available and that at least two team members know how to use them. Run a brief internal exercise each quarter to test that access and tooling work as expected under realistic conditions.
Step 2. Detect, confirm, and triage the incident
Fast, accurate detection is what separates a contained incident from one that spreads undetected across your network. Your incident response checklist should prompt your team to follow a structured detection and triage process rather than react to the first alert that appears. The goal at this stage is to confirm whether a genuine incident has occurred, understand its scope, and prioritise your response based on real business impact.
Confirm the incident before declaring it
Not every alert is a confirmed incident. Before escalating, verify the activity using at least two independent sources, such as your SIEM logs, endpoint detection and response alerts, and firewall data. Document the initial indicator, the time it was identified, and who confirmed it.
This record becomes your evidence trail if regulators or insurers request a timeline later. Log every action your team takes from this point forward, including what you ruled out and why. That documentation protects you and supports a faster post-incident review.
Misclassifying a false positive as a real incident wastes resources. Misclassifying a real incident as a false positive costs you critical response time.
Triage by severity and business impact
Once confirmed, score the incident using a consistent severity framework based on two factors: the sensitivity of the data or systems involved, and the operational impact if the incident continues unchecked.
Use this triage template as a starting point:
| Severity | Criteria | Response Priority |
|---|---|---|
| Critical | Core systems down or data exfiltration in progress | Immediate |
| High | Ransomware detected or privileged account compromised | Within 1 hour |
| Medium | Isolated malware or suspected phishing | Within 4 hours |
| Low | Policy violation or minor anomaly | Within 24 hours |
Assign a severity rating before mobilising your full response team, so you deploy the right level of resources without under- or overreacting to each event.
Step 3. Contain the threat and protect the evidence
Containment stops an active threat from spreading while preserving evidence for investigation, legal proceedings, or regulatory review. This phase of your incident response checklist requires two parallel tracks running at the same time: limiting the damage by isolating affected systems, and preserving everything your team will need to understand what happened and why.
Isolate affected systems without destroying evidence.
Your first priority is to isolate the affected system from the rest of your network to prevent lateral movement. Disconnect it by disabling its network interface or removing it from its switch port. Do not power off the machine. Shutting down a live system can overwrite volatile memory that holds critical forensic data, including active process lists, open network connections, and decryption keys stored in RAM.
Powering off a compromised machine feels instinctive, but it regularly destroys the evidence needed to understand the full scope of an attack.
Document every containment action you take
From the moment you begin containment, log each action with a timestamp and the name of the person who carried it out. This creates a defensible chain of custody if regulators, insurers, or law enforcement later request your incident timeline.
Use this containment log template to capture the key details:
| Timestamp | Action Taken | Performed By | Systems Affected |
|---|---|---|---|
| Network isolation | |||
| Credential reset | |||
| Access revocation | |||
| Forensic image taken |
Capture screenshots, log exports, and memory dumps before you alter anything else. Store copies on an isolated, write-protected device so the evidence remains unaltered throughout your investigation.
Step 4. Eradicate, recover, and validate systems
Eradication and recovery are where your organisation moves from managing the incident to rebuilding normal operations. This phase of your incident response checklist requires a disciplined sequence: remove the threat completely, restore clean systems, and then validate everything before reconnecting anything to your live environment. Skipping validation is one of the most common reasons organisations face a second incident within weeks of the first.
Remove the threat before you restore anything.
Start by confirming the full scope of compromise across all affected systems. Use your endpoint detection tooling and log data to identify every host, account, or file the attacker touched. Wipe or rebuild affected machines from a known-clean baseline rather than attempting to clean them in place. Reset all credentials associated with compromised accounts, including service accounts, and revoke any tokens or API keys that may have been exposed during the incident.
Restoring from backup before confirming the backup itself is clean will reintroduce the threat into your environment.
Restore systems and validate before going live.
Restore systems from verified pre-incident backups, and document the restore point used for each system. Before reconnecting any restored machine to your network, run the following validation checks:
- Confirm no malicious files, scheduled tasks, or registry entries remain
- Verify patch levels and configurations match your hardened baseline
- Test core business functions in an isolated environment
- Confirm logging and monitoring are active on the restored system
- Get sign-off from your Incident Response Lead before reconnection
Only once all checks pass should you bring systems back online and resume normal operations.
Next steps to tighten your response
Working through this incident response checklist gives your organisation a structured foundation, but a plan remains effective only if you test and update it regularly. Run a tabletop exercise at least twice a year where your response team walks through a realistic scenario step by step. These sessions expose gaps in your process before a real incident does, and they build the muscle memory your team needs to act decisively under pressure.
After each exercise or real incident, update your checklist to reflect what you learned. Roles change, systems evolve, and threats shift, so a plan written 18 months ago may no longer reflect how your organisation actually operates. Review your escalation thresholds, contact lists, and backup validation steps at each update cycle.
If you want expert support building or stress-testing your response capability, TrustedIA’s managed cyber security services give you access to over 30 years of hands-on incident response experience.