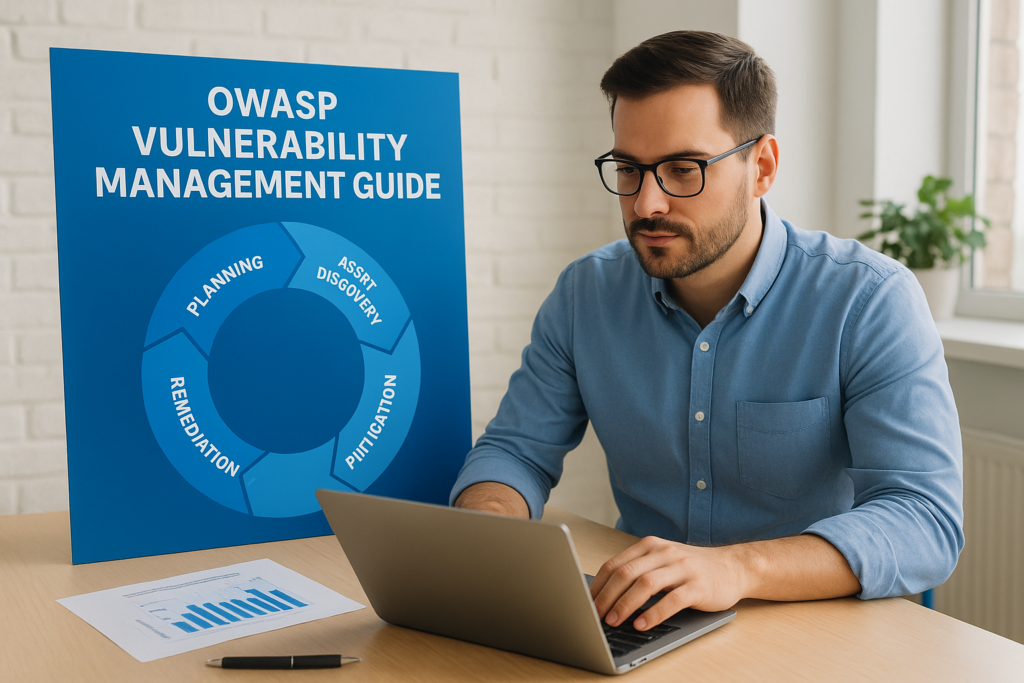
Most organisations know they have vulnerabilities. The harder part is managing them consistently, deciding what to fix first, tracking remediation, and proving progress to stakeholders. That’s exactly the problem the OWASP Vulnerability Management Guide was built to solve. It provides a structured, open-source framework for turning ad hoc scanning into a repeatable programme that actually reduces risk over time.
But reading through OWASP’s documentation and translating it into a working programme are two very different things. You need to map its recommendations to your own infrastructure, tooling, and team capacity. You also need to align it with any compliance obligations you’re already working toward, ISO 27001 being a common one, where vulnerability management is a core control, not an optional extra. At TrustedIA, we help businesses do exactly this: build and run vulnerability management programmes grounded in proven frameworks, backed by over 30 years of hands-on experience in managed cybersecurity services.
This guide breaks down the OWASP vulnerability management lifecycle step by step, covering everything from asset discovery and vulnerability identification through to prioritisation, remediation, and continuous improvement. By the end, you’ll have a clear blueprint for building a programme that scales with your organisation.
What the OWASP vulnerability management guide covers
The OWASP vulnerability management guide is an open-source framework that defines the complete lifecycle of a vulnerability management programme. Rather than focusing on a single tool or scan type, it covers every stage from asset discovery through to verified remediation, giving you a structured way to manage risk across your entire environment consistently and repeatably.
The core lifecycle it defines
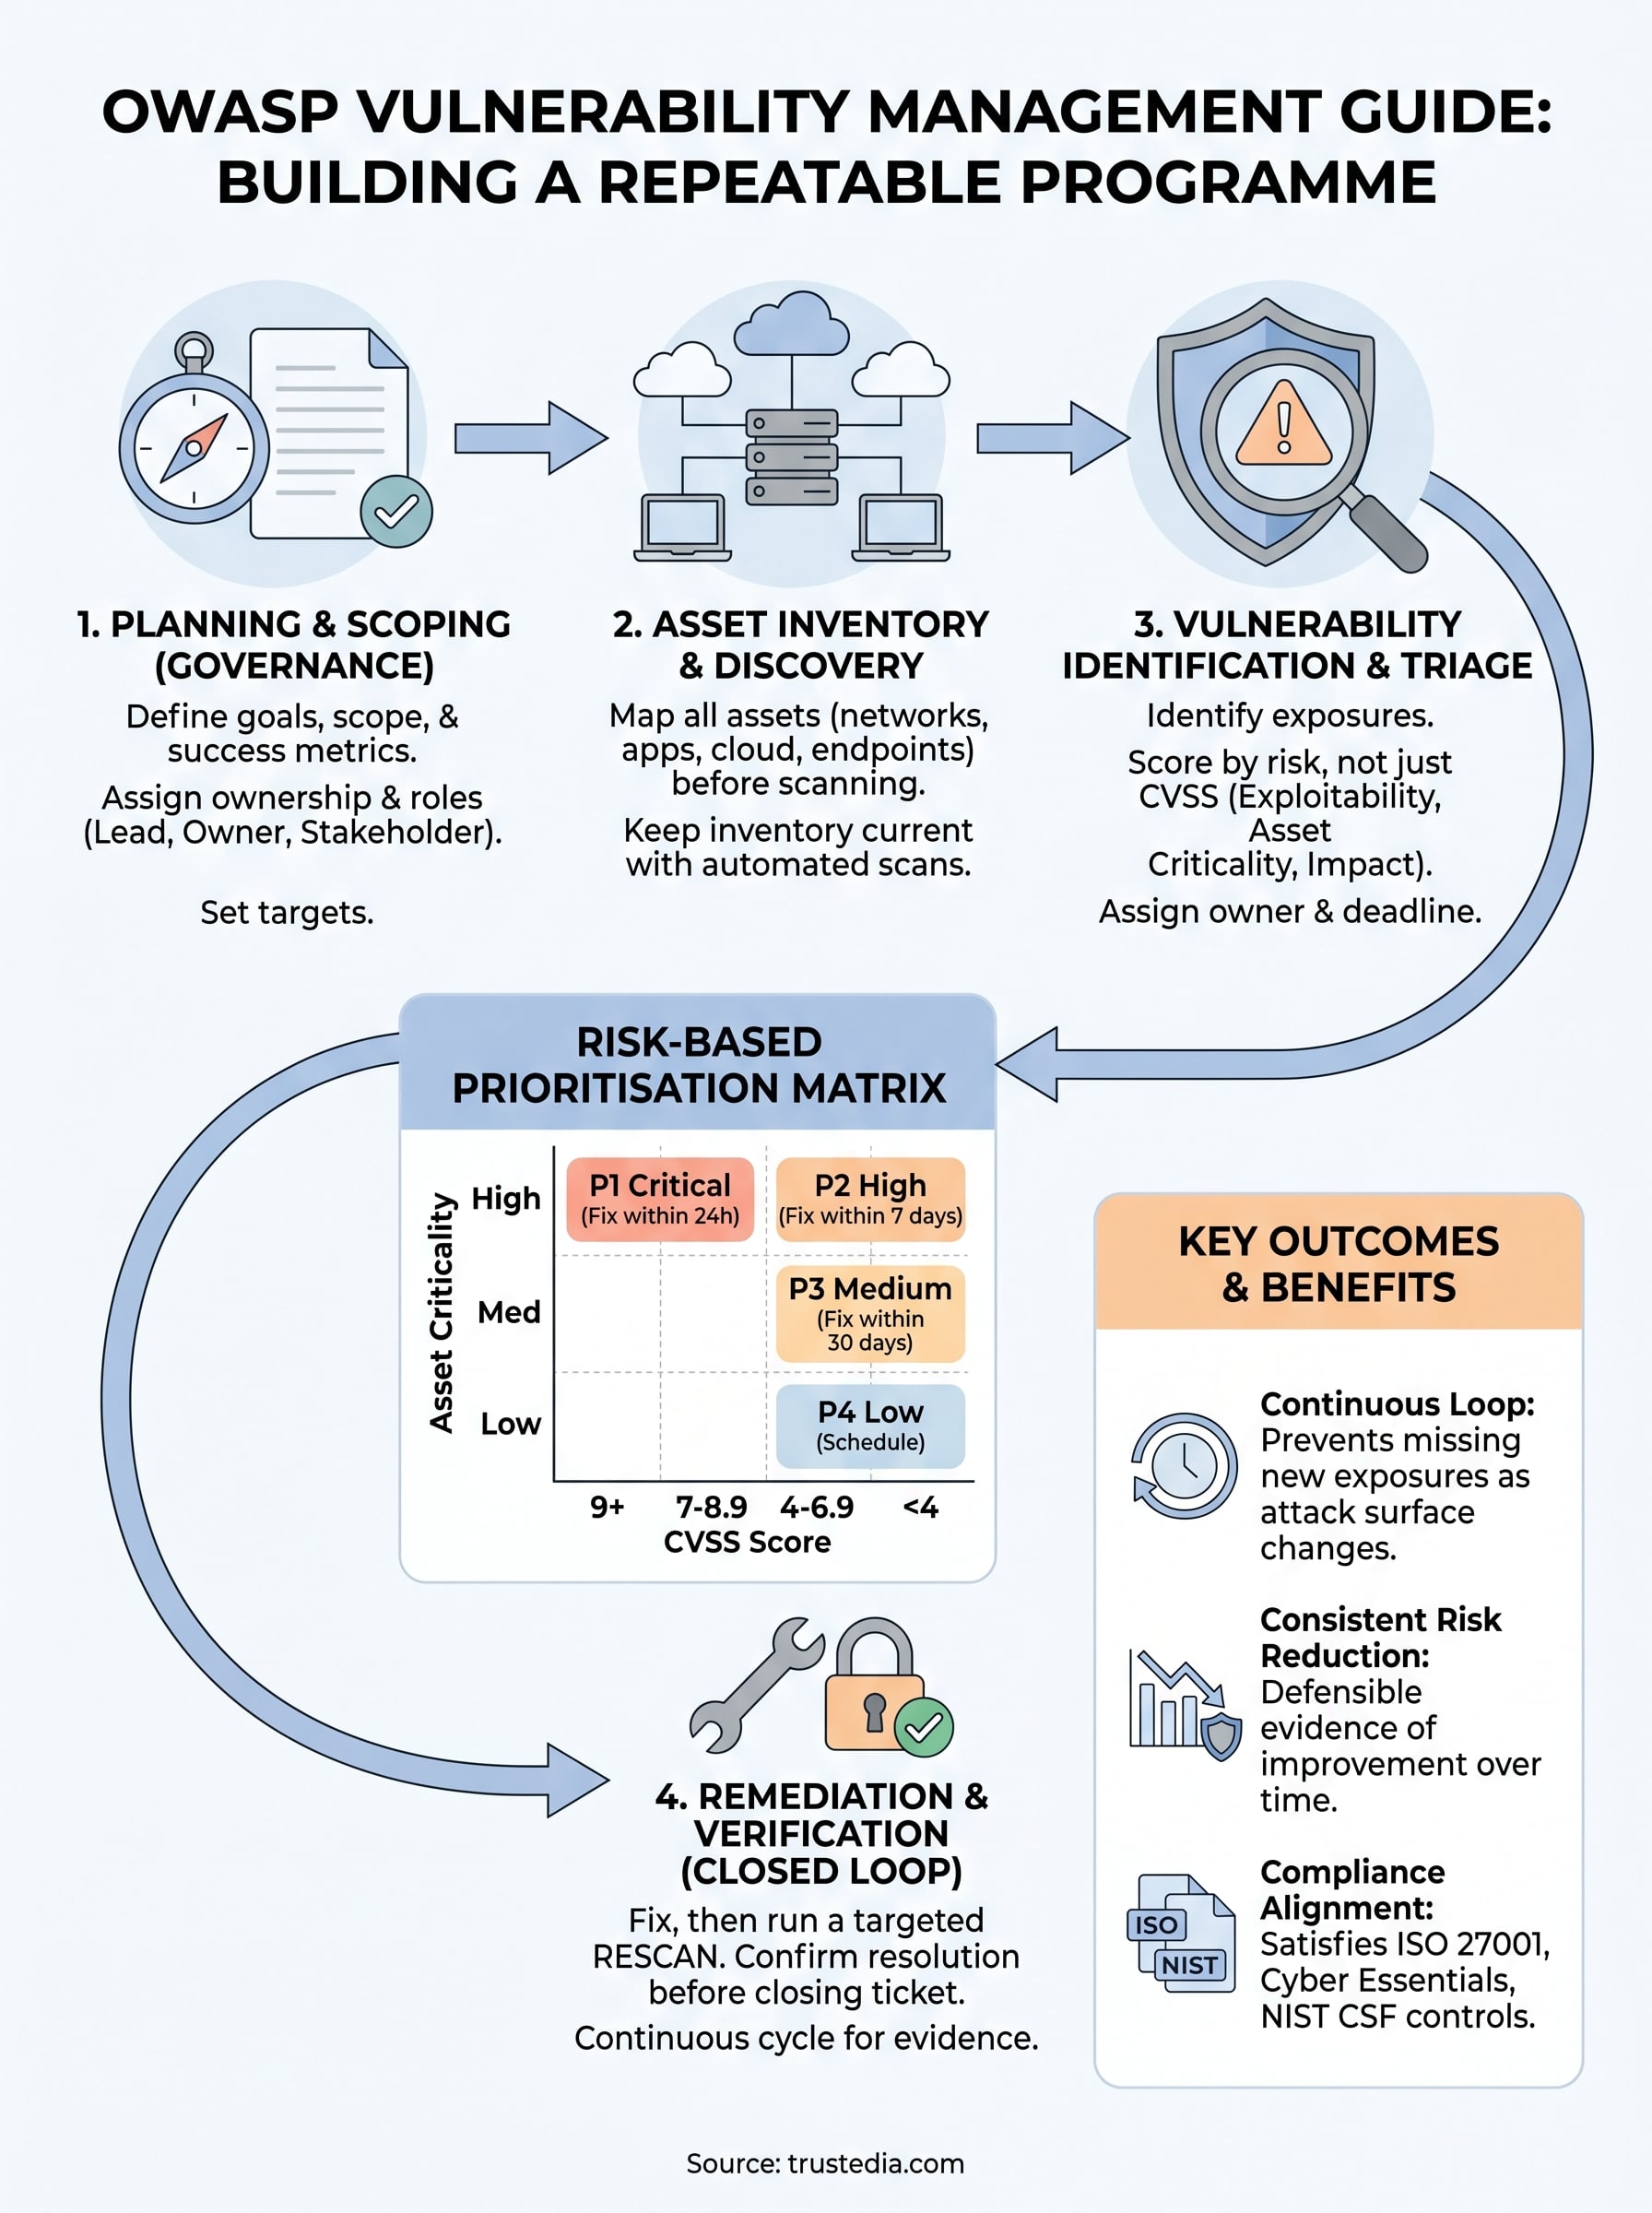
The guide breaks the process into five connected phases: planning and scoping, asset inventory and discovery, vulnerability identification, risk-based prioritisation, and remediation with verification. Each phase feeds into the next, creating a continuous loop rather than a linear project. This matters because your attack surface changes constantly, and a programme that stops after the first scan will miss new exposures as they appear.
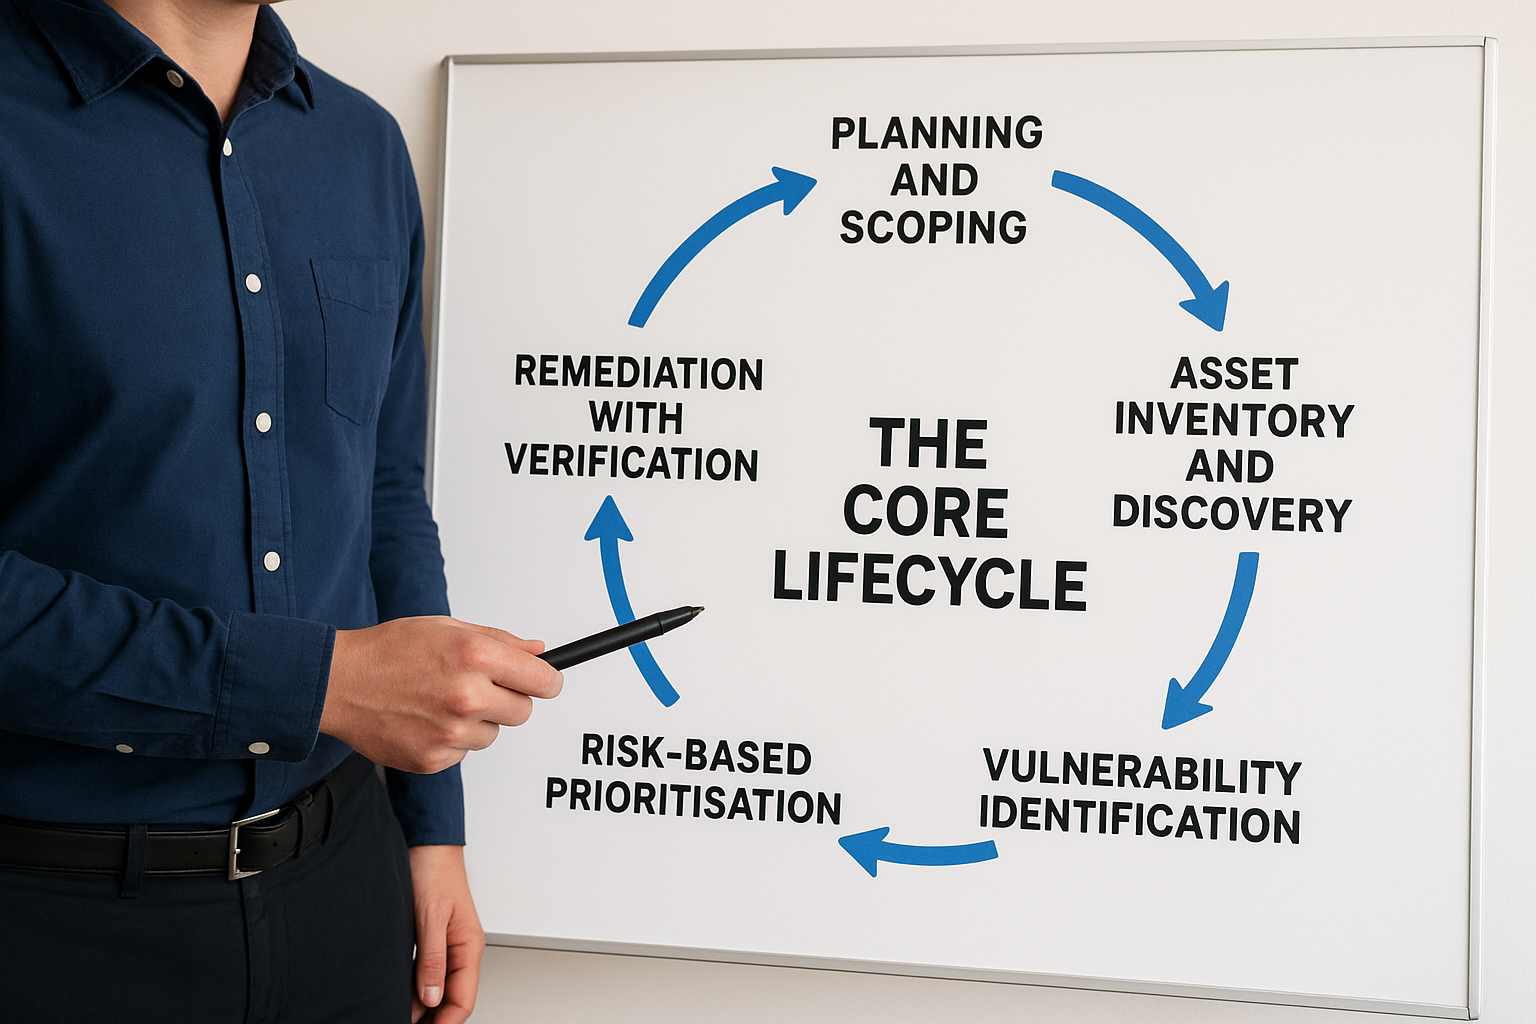
A vulnerability management programme without a continuous loop is just a point-in-time snapshot, and attackers don’t wait for your next scheduled scan.
Equally important, the framework sets clear expectations around governance and ownership. It defines the need for assigned roles, escalation paths, and regular reporting cadences. Without these in place, findings accumulate, remediation stalls, and your risk posture deteriorates even when your scanning coverage improves.
How it connects to compliance frameworks
If you’re working toward ISO 27001 certification, the OWASP guide maps directly onto Annex A control areas covering information security, vulnerability management, and technical review. It gives you a practical operating model that satisfies those controls rather than just documenting them on paper. The same applies to frameworks such as Cyber Essentials or NIST CSF, where vulnerability identification and remediation are explicit, auditable requirements.
Building on the OWASP guide as your foundation means you can satisfy multiple compliance obligations simultaneously, rather than redesigning your process every time a new standard or audit requirement appears. That efficiency compounds over time, reducing both operational overhead and compliance risk.
Step 1. Set goals, scope, and governance
Before you run a single scan, you need to define what success looks like. The OWASP vulnerability management guide makes clear that programmes without defined goals and governance fail not because of poor tooling, but because ownership and accountability are undefined from the start. Getting this foundation right determines whether your programme delivers consistent results or stalls after the first scan cycle.
Define your scope and success metrics
Your scope determines what you protect. Start by deciding which systems, networks, and applications fall within the programme’s boundaries, then set measurable targets. For example: "reduce critical vulnerabilities to zero within 14 days of discovery" or "resolve all high-severity findings within 30 days of identification." Specific targets give your team clear priorities and give management meaningful progress reports.
Without a defined scope, your programme will expand indefinitely and never produce clean, reportable results.
Assign ownership and governance roles
Every finding needs an owner, or it will sit unresolved. Map your governance structure to three core functions: a programme lead who runs scans and tracks remediation, asset owners who fix assigned findings, and a reporting stakeholder who reviews progress against targets. Use a simple template to document this from day one:
| Role | Responsibility | Typical Owner |
|---|---|---|
| Programme Lead | Runs scans, tracks remediation | Security Team |
| Asset Owner | Fixes assigned vulnerabilities | IT / Dev Teams |
| Reporting Stakeholder | Reviews metrics and risk posture | CISO / Management |
This structure keeps remediation accountable and gives you a clear escalation path when deadlines slip.
Step 2. Build your discovery and asset inventory loop
You can’t protect what you don’t know exists. The OWASP vulnerability management guide treats asset inventory as the foundation of the entire programme, and for good reason: organisations that skip this step routinely discover exposed systems during a breach that nobody knew were running. Before you scan for vulnerabilities, you need a complete, current picture of your attack surface.
Map your assets before you scan them
Asset discovery means identifying every device, application, and service connected to your network, including cloud instances, remote endpoints, and legacy systems. Start by combining automated network scanning with your existing CMDB or asset register to close the gaps between what you think you own and what’s actually exposed.
The assets you forget to include in your inventory are exactly the ones attackers will find first.
Use this template to categorise your assets consistently:
| Asset Type | Example | Priority |
|---|---|---|
| Internal servers | Domain controllers, file servers | High |
| Web applications | Customer portals, APIs | High |
| Endpoints | Laptops, desktops | Medium |
| Cloud services | Hosted instances, SaaS tools | Medium |
Keep your inventory current
Your inventory becomes outdated the moment you finish building it. Set up automated discovery scans on a defined schedule, at minimum weekly for internet-facing assets and monthly for internal infrastructure. Assign an asset owner for each category so additions and decommissions get recorded in real time, not retrospectively.
Step 3. Triage findings and prioritise remediation
Your scanners will return more findings than your team can fix in one sprint. The OWASP vulnerability management guide is explicit on this point: raw CVSS scores alone are not enough to make good prioritisation decisions. You need to combine exploitability, asset criticality, and business impact to decide what gets fixed first, rather than working through a flat list ordered by score.
Score vulnerabilities by risk, not just severity
When you triage a finding, assess it across three dimensions: the CVSS base score, the criticality of the affected asset, and whether active exploitation is known. A critical vulnerability on an isolated internal test server ranks lower than a medium-severity flaw on your customer-facing web application. Use a simple scoring matrix to make this consistent across your team:
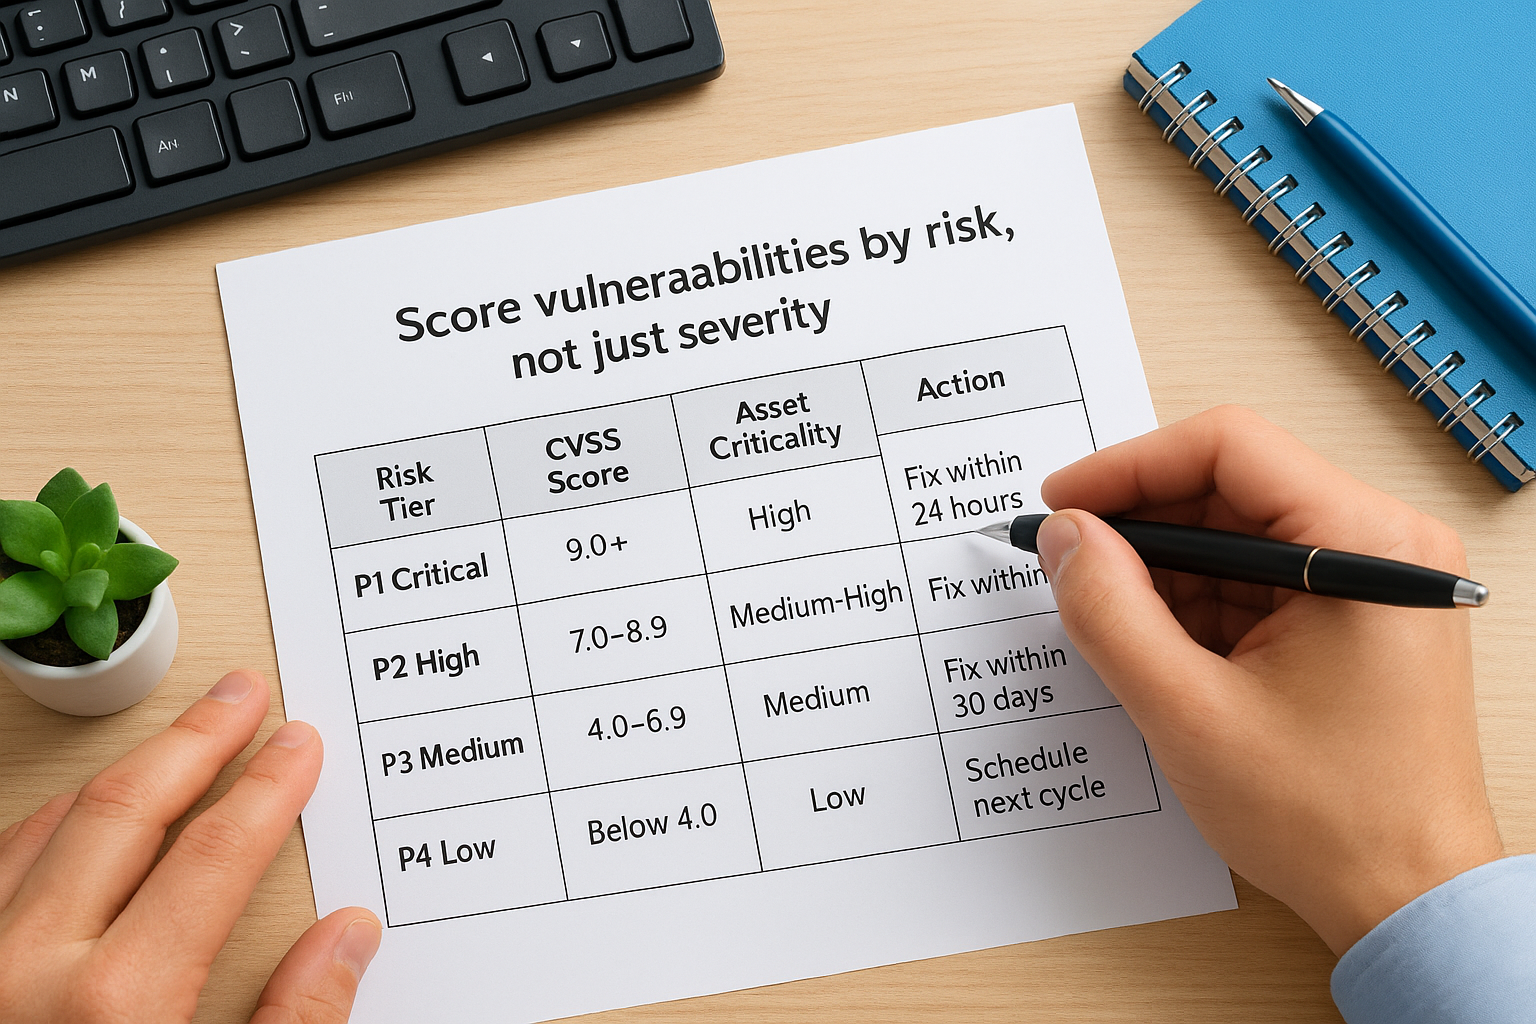
Prioritising by raw CVSS score without context will have you fixing low-risk findings while your most exposed assets wait.
| Risk Tier | CVSS Score | Asset Criticality | Action |
|---|---|---|---|
| P1 Critical | 9.0+ | High | Fix within 24 hours |
| P2 High | 7.0-8.9 | Medium-High | Fix within 7 days |
| P3 Medium | 4.0-6.9 | Medium | Fix within 30 days |
| P4 Low | Below 4.0 | Low | Schedule next cycle |
Assign each finding to an owner before moving on
Every triaged vulnerability needs an assigned owner and a deadline before it leaves the triage stage. Without this step, findings sit in a backlog with no accountability. Record the assigned owner, target resolution date, and current status in your tracking tool so progress is visible to all stakeholders at a glance.
Step 4. Fix, verify, and run a repeatable cycle
Fixing vulnerabilities without verifying the fix is one of the most common programme failures. The OWASP vulnerability management guide requires a closed-loop process: every remediation must be followed by a verification scan before the finding is marked resolved. This step transforms your programme from a list of tasks into a risk-reduction engine that produces evidence you can present to auditors and management.
Remediate and verify each finding
Once an asset owner resolves a finding, run a targeted rescan against that specific asset before closing the ticket. A rescan typically takes under an hour and confirms the fix worked without waiting for your next full scan cycle. Use this workflow to keep the loop clean:
| Stage | Action | Owner |
|---|---|---|
| Remediation | Apply patch or configuration fix | Asset Owner |
| Rescan | Run targeted scan on affected asset | Security Team |
| Verification | Confirm finding no longer appears | Programme Lead |
| Closure | Mark ticket resolved with evidence | Programme Lead |
Run your programme as a continuous cycle
After verification, schedule your next full discovery scan based on the cadence you defined in Step 1. Treat each cycle as a new baseline, comparing your current open vulnerability count against the previous cycle to track whether risk is actually falling over time.
A programme that measures progress cycle-over-cycle gives you defensible evidence of improvement, not just activity.
Where to go from here
Following the OWASP vulnerability management guide gives you a structured path from scattered, reactive scanning to a programme that consistently reduces risk. You now have the four core building blocks: defined goals and governance, a live asset inventory, risk-based triage, and a closed-loop remediation cycle. Each step builds on the last, so skipping any one of them will create gaps that grow over time.
Building and running this programme alongside your day job is where most organisations hit a wall. Your team can follow the framework correctly and still struggle with limited tooling, inconsistent scan coverage, or slow remediation cycles when everyone treats it as a secondary priority.
That’s where a managed approach makes the difference. TrustedIA provides hands-on vulnerability management and cyber assurance services built around proven frameworks, including OWASP and ISO 27001. If you want expert support to get your programme running properly, speak to the TrustedIA team and find out how they can help.